Archives

All posts by unowen

Poster

Intermediate | 3h 02m | 1.11 GB | Project Files 3 MB | Required Software: CINEMA 4D

In this series of lessons we?ll learn to use CINEMA 4D’s unique modeling workflow to create organic polygon models. We’ll start out by talking about what polygons are and what the advantages and disadvantages are of using them. Then, using a dinosaur as an example, we’ll use CINEMA 4D’s procedural, hierarchy-based workflow in combination with traditional polygon techniques to build an organic model from scratch. We’ll cover polygon tools that will allow you to extrude, cut, or subdivide your geometry as well as generators that will allow you to work symmetrically and to see a smoothed version of your model as you work. In the end you’ll have a great idea of the power and flexibility CINEMA 4D offers when building polygonal models.

Home:
http://www.digitaltutors.com/11/training.php?pid=691

Download:
http://bytesbox.com/!/Dc9fcUvwx77eaBV/
http://bytesbox.com/!/PqzxRH4ZG3Vj7vS/
http://bytesbox.com/!/J4yrbyYU8ziXddB/
div
http://ul.to/vn6kl66x/DTPMWiC4D_01.rar
http://ul.to/j9se12d7/DTPMWiC4D_02.rar
http://ul.to/ir60jn6l/DTPMWiC4D_03.rar
div

Poster

Intermediate | 2h 10m | 1.00 GB | Project Files 184 MB | Required Software: Unity 3.5

In this course we’ll be discussing most of the major features added to the Unity game engine in the latest release, Unity 3.5. Through out these lessons, we’ll learn how to utilize Unity’s Pathfinding system to create quick and efficient AI. Then we’ll move on by discussing the new particle system interface called Shuriken where we’ll create a pillar of fire. After that, we’ll get into working with the HDR capabilities and create a stunning composition in real time. Then we’ll finish this course up by discussing light probes and occlusion culling. Both are great ways to create a beautiful game but also keep our performance costs low.

Home:
http://www.digitaltutors.com/11/training.php?pid=693

Download:
http://bytesbox.com/!/NM6orUCrLhuHgFy/
http://bytesbox.com/!/9Wy0xMBNhCrtb0v/
http://bytesbox.com/!/PfhX8fCYnpAtHDb/
div
http://ul.to/id98wj6f/DTNFiU35_01.rar
http://ul.to/cz4575bq/DTNFiU35_02.rar
http://ul.to/u7wui5h3/DTNFiU35_03.rar
div

Poster

Advanced | 2h 53m | 836 MB | Project Files 122 MB | Required Software: Photoshop CS5

In this Photoshop tutorial we will look at the basic principles of designing a video game character utilizing Photoshop as a drawing and painting tool. We’ll learn about subjects such as sketching, design, rendering techniques and orthographic models sheets. We’ll begin with the exploratory sketching phase, which is a stage where the concept artist produces loose grayscale sketches to communicate ideas to the team. We’ll then take that sketch from a rough idea into a fully realized piece of concept art. From there, we’ll take the design into a key part of video game character concept art: the orthographic. By the end of this tutorial we will have taken a look at a typical video game studio pipeline and learned numerous tips and techniques for how to be efficient in a video game production environment.

Home:
http://www.digitaltutors.com/11/training.php?pid=685

Download:
http://bytesbox.com/!/EVIZ22P81PTL50J/
http://bytesbox.com/!/v82dtLINhPsjC6P/
http://bytesbox.com/!/pSPOzo7qwmDAAaR/
div
http://ul.to/p3kx2ylh/DTCDCCWfGiP_01.rar
http://ul.to/38h6gx09/DTCDCCWfGiP_02.rar
http://ul.to/ujq76poc/DTCDCCWfGiP_03.rar
div

Poster

Intermediate | 1h 56m | 684 MB | Project Files 47 MB | Required Software: NUKE 6.3v6

In this series of tutorials we?ll learn how to use tracker and roto nodes in NUKE to quickly create a solid matte. By using each node for their specific strength, we?ll be able to achieve production-quality results much faster than using just hand keying. We?ll begin this project by learning the basics of using trackers to speed up the rotoscoping process by removing camera jitter, translation, rotation and scaling. We?ll then dive into our main project where we will use a combination of trackers, roto nodes and animation to create a clean mask for our foreground actor’s face and hand. We?ll learn many techniques to speed up our rotoscoping workflow and how we can use animation principles to create solid movement.

Home:
http://www.digitaltutors.com/11/training.php?pid=687

Download:
http://bytesbox.com/!/zDK5iw9LPelsBu3/
http://bytesbox.com/!/Zciidj8aS7AEba2/
div
http://ul.to/nhsq2n5y/DTRTIN_01.rar
http://ul.to/w875lrt6/DTRTIN_02.rar
div

Poster

Intermediate | 2h 04m | 785 MB | Project Files 16 MB | Required Software: CINEMA 4D R13

In this set of tutorials you will learn how to automatically rig creatures with CINEMA 4D’s new Character Object. Through this set of tutorials you will learn how to use the Character Object to auto-rig creatures and how to adjust the control rig to match its exact proportions! We’ll then explore some of the features built into the Character Object that allow us to auto-weight geometry, filter what gets displayed in the scene, and take a look at a system that generates automatic animation cycles. We’ll also cover how to integrate custom systems of our own into the auto-rig, weight painting and weight mirroring techniques, as well as how to collapse the rig in order to export it for use in an older version of CINEMA 4D. In the end, you will learn how the Character Object can be used to make your rigging workflow far more efficient!

Home:
http://www.digitaltutors.com/11/training.php?pid=690

Download:
http://bytesbox.com/!/G3yeXdGFSuFxDR8/
http://bytesbox.com/!/GtYtmRZM0AAdQ3w/
div
http://ul.to/g4sziitw/DTCFRwtCOiC4D_01.rar
http://ul.to/0np49cd0/DTCFRwtCOiC4D_02.rar
div

Poster

Advanced | 13h 38m | 5.34 GB | Project Files 38 MB | Required Software: V-Ray, Maya, Photoshop

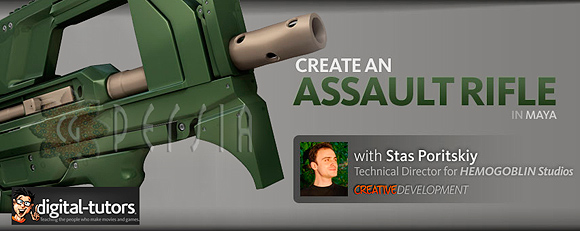
In this Maya tutorial we will begin by starting out with just a concept image and start to explore methods used to quickly and efficiently create 3D model of a weapon. Along the way we will be encountering topology issues and learn new ways of troubleshooting those. We will be focusing on less of a traditional tools that are used today for modeling, and rather explore creative ways of application for the news onces. Upon completing our model, we will look at basics of V-Ray material setup for Maya, where we explore various options and what effect they have, look at couple of a rendering tips to improve the quality of our final image, and touch a few basic steps on compositing of our final image.

Home:
http://www.digitaltutors.com/11/training.php?pid=681

Download:
http://bytesbox.com/!/ZCfK8CtnSGqfydP/
http://bytesbox.com/!/ZKVfDCGG9PNVIbU/
http://bytesbox.com/!/9rZbXJYvB8X7W20/
http://bytesbox.com/!/Fl8Gna5N4s9QYz3/
http://bytesbox.com/!/zSqzZJZZSNFovbE/
http://bytesbox.com/!/5wBrIX5Q25rVH9T/
http://bytesbox.com/!/FwrOpFcxaoUoM0o/
http://bytesbox.com/!/CFxYUHPA4x8SUrO/
http://bytesbox.com/!/H5TYYu4Mc2XocML/
div
http://ul.to/7himw4si/DTCDCaARiM_01.rar
http://ul.to/c3hrnp30/DTCDCaARiM_02.rar
http://ul.to/564jajum/DTCDCaARiM_03.rar
http://ul.to/kuzmcwwa/DTCDCaARiM_04.rar
http://ul.to/avr2xndd/DTCDCaARiM_05.rar
http://ul.to/4b9ajgzt/DTCDCaARiM_06.rar
http://ul.to/n6we8jd8/DTCDCaARiM_07.rar
http://ul.to/y2bdwfu1/DTCDCaARiM_08.rar
http://ul.to/smq5xok2/DTCDCaARiM_09.rar
div

Poster

Advanced | 2h 06m | 816 MB | Project Files 63 MB | Required Software: Maya 2012

In this series of Maya tutorials you will learn about Maya’s Constrain menu. Each video in this course is a self-contained lesson centering on one of the commands found in the Constrain menu in Maya. This means that these lessons can be viewed in any order you wish, allowing you to jump straight to the content that is most relevant to you. Over the course of these lessons, we’ll take a detailed look at each of the Constrain commands and how each of them can be used to speed up our workflow.

Home:
http://www.digitaltutors.com/11/training.php?pid=621

Download:
http://bytesbox.com/!/3Kr6hYoIg5WYDoR/
http://bytesbox.com/!/e84FcSSspjqvUI2/
http://bytesbox.com/!/MXlUP0EfO7tGeWd/
div
http://ul.to/oeujm4bn/DTMRRLCM.part1.rar
http://ul.to/q8lhbpr0/DTMRRLCM.part2.rar
http://ul.to/ggbfbse0/DTMRRLCM.part3.rar
div

Poster

Advanced | 2h 31m | 878 MB | Project Files 174 MB | Required Software: Maya 2008 and RenderMan for Maya 2

In this RenderMan for Maya tutorial, we will learn the successive steps of creating a photorealistic soap bubble shader. From a reference picture to the finished shader, these videos will show how to choose the shading models and surface parametrizations to use. We will go over the math and physics involved and how to derive a shader implementation. We will address the issues caused by using raytracing as well as animation whithin the shader and support for use of the shader with Maya’s particle system.

Home:
http://www.digitaltutors.com/11/training.php?pid=629

Download:
http://bytesbox.com/!/0Nj3y7R0j7zDPDJ/
http://bytesbox.com/!/Eh3aDz1vzcEOTEt/
http://bytesbox.com/!/jwjbp9zu4rSw5QA/
div
http://ul.to/kxwnxws1/DTCDPSBSDiRMfM.part1.rar
http://ul.to/jh8fzzqp/DTCDPSBSDiRMfM.part2.rar
http://ul.to/x1yv661t/DTCDPSBSDiRMfM.part3.rar
div