Lynda – Mograph Techniques: Spline Dynamics with CINEMA 4D with EJ Hassenfratz
Continue Reading
Duration 10h 45m Level Advanced Project Files Included 15FPS MP4 5.16GB
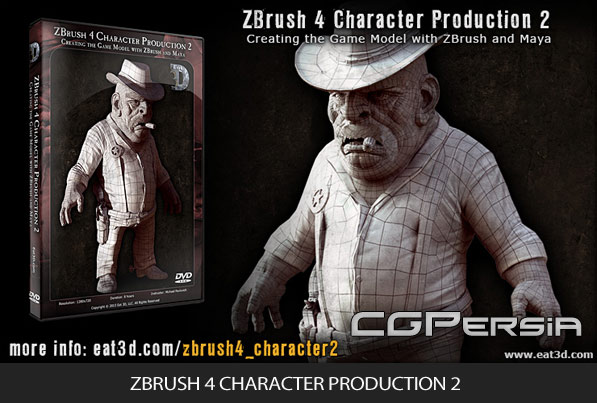
In this series of tutorials we will learn how to create a realistic character from scratch, covering modeling and texture creation.
Throughout will go over concept selection, and blocking in of forms using ZBrush 4R6’s powerful suite of tools, we will also be jumping into Maya for base mesh creation for some of more complex pieces. I’ll discuss different sculpting techniques giving you a good overview on different problem areas such as leather or skin pores. We’ll then discuss how to go about texturing and retopologizing the high-resolution models in TopoGun and Photoshop. We’ll be using UV layout for the fast and easy UV creation. Normals and and other maps will be generated using TopoGun, XNormal, and a versatile map creation program.
Over the course of the tutorial we will cover general anatomy, as well as introducing a DynaMesh workflow and topology geared towards animation. We will go over utilizing Polypaint to hand paint our base textures, which will later be enhanced in Photoshop and dDo.The tutorial will end with a semi-low resolution character with normal maps and diffuse geared towards a realtime game workflow. Tips learned here can be applied to any realistic or stylized character.
?
Rapidgator
http://rapidgator.net/file/606c4eb06e6c02f64617b60f1bc9ab45/DTHiReGChCrPiZBMaya.part01.rar.html
http://rapidgator.net/file/4758b322eb53d579b987112c8cfc79e9/DTHiReGChCrPiZBMaya.part02.rar.html
http://rapidgator.net/file/5fa1b759e8acc06ca061f377bca3e7af/DTHiReGChCrPiZBMaya.part03.rar.html
http://rapidgator.net/file/5b5fd30c4a71fdc649f537737337b871/DTHiReGChCrPiZBMaya.part04.rar.html
http://rapidgator.net/file/d4670e0da7a9f847d574594f2e520cb0/DTHiReGChCrPiZBMaya.part05.rar.html
http://rapidgator.net/file/46b98ab9314101f5b8aed955d667018d/DTHiReGChCrPiZBMaya.part06.rar.html
http://rapidgator.net/file/492661aba6eb730785178dcc8c0d1312/DTHiReGChCrPiZBMaya.part07.rar.html
http://rapidgator.net/file/24a1ff2c97cc2569ffb9f82d27b7c147/DTHiReGChCrPiZBMaya.part08.rar.html
http://rapidgator.net/file/c5045793ce228d365d52aa98d619a86d/DTHiReGChCrPiZBMaya.part09.rar.html
Filefactory
http://www.filefactory.com/file/36llc5m6uapp/DTHiResGameCharCreatPipelZBMaya_part01_rar
http://www.filefactory.com/file/4t2usrdpn7gh/DTHiResGameCharCreatPipelZBMaya_part02_rar
http://www.filefactory.com/file/2ehlajcmjpu5/DTHiResGameCharCreatPipelZBMaya_part03_rar
http://www.filefactory.com/file/o34twh8cunt/DTHiResGameCharCreatPipelZBMaya_part04_rar
http://www.filefactory.com/file/1smnzaf0ssbp/DTHiResGameCharCreatPipelZBMaya_part05_rar
http://www.filefactory.com/file/2jpnqy2u02e9/DTHiResGameCharCreatPipelZBMaya_part06_rar
http://www.filefactory.com/file/7gf0u2pk5rw7/DTHiResGameCharCreatPipelZBMaya_part07_rar
http://www.filefactory.com/file/6sndcrzptdz5/DTHiResGameCharCreatPipelZBMaya_part08_rar
http://www.filefactory.com/file/19iwfpbvpfnl/DTHiResGameCharCreatPipelZBMaya_part09_rar
Uploaded
http://ul.to/gcr6r9tv
http://ul.to/hy09y4ai
http://ul.to/glxkfmq5
http://ul.to/56w2j7og
http://ul.to/gnd7q3t5
http://ul.to/iap3x3fv
http://ul.to/q2nwksi9
http://ul.to/08flzn1b
http://ul.to/c58w7qia
Lynda – Designing a Calendar with Nigel French
Topaz Photoshop Plugins Bundle 2013 DC 06.11.2013
Continue Reading
Duration 2h 18m 30FPS MP4
Dominic Qwek covers how to create realistic skin for his creature designs using ZBrush, Keyshot and Photoshop. He starts off by using ZBrush to sculpt realistic skin details such as wrinkles, moles and warts. Dominic then uses polypaint in ZBrush to texture skin tones where he adopts a layered approach for realistic results. Using the GoZ plugin, he imports the polypainted model into Keyshot where he starts lighting and shading. Keyshot’s translucent shader is explained, as well as its HDR lighting features, for photo-realistic and interactive rendering. Finally, Dominic shares his post-processing workflow in Photoshop to achieve the final image.
Nitroflare
http://nitroflare.com/view/16D657F911B1ECE/TGWRealisticSkinZBrushKeyshot.part1.rar
http://nitroflare.com/view/516DFF891F0AE3B/TGWRealisticSkinZBrushKeyshot.part6.rar
http://nitroflare.com/view/E4CEB4273113530/TGWRealisticSkinZBrushKeyshot.part4.rar
http://nitroflare.com/view/468540E793F4587/TGWRealisticSkinZBrushKeyshot.part5.rar
http://nitroflare.com/view/414C364CD8DB28A/TGWRealisticSkinZBrushKeyshot.part2.rar
http://nitroflare.com/view/764E8E8CC7CA511/TGWRealisticSkinZBrushKeyshot.part3.rar
http://nitroflare.com/view/D66295F8C1FC6D0/TGWRealisticSkinZBrushKeyshot.part7.rar
Rapidgator
http://rg.to/file/11a62fcf6bb52776270b595cf49035e2/TGWRealisticSkinZBrushKeyshot.part1.rar.html
http://rg.to/file/6824a73cd65eac49f55e2b5f5a3a8f41/TGWRealisticSkinZBrushKeyshot.part2.rar.html
http://rg.to/file/da71ee681dd2bd012a97700f0056c698/TGWRealisticSkinZBrushKeyshot.part3.rar.html
http://rg.to/file/28daa6359ed82c50962ffdaed2f734a5/TGWRealisticSkinZBrushKeyshot.part4.rar.html
http://rg.to/file/d83ed182abb60aed3c6d2ce76a3a708a/TGWRealisticSkinZBrushKeyshot.part5.rar.html
http://rg.to/file/00010cd1e28c90c8a815db8223a50b09/TGWRealisticSkinZBrushKeyshot.part6.rar.html
http://rg.to/file/d6a29f4a4bc5661f5292f5885690bd26/TGWRealisticSkinZBrushKeyshot.part7.rar.html
Uploaded
http://ul.to/aarawk21
http://ul.to/rb4vhocq
http://ul.to/jez6w3nv
http://ul.to/jiuxgw7h
http://ul.to/lvrtnanx
http://ul.to/dzjn09u1
http://ul.to/dns0o3tr
PixelPuffin DepthArtist v1.0 Nuke 6.3 Nuke 7.0 WIN64
Continue Reading
Text Edge FX Pro Bevel Kit for Cinema 4D
Maxwell Render Full Material Library 2006-2013
Continue Reading
Duration 2h 24m Level Intermediate Project Files Included 15FPS MP4 1.81GB
In this series of tutorials, we will learn how to create a 3D text composition in CINEMA 4D which we then bring into After Effects and place in a live action shot. We’ll begin by learning the proper format to export text from Illustrator, so that it can be properly opened inside of CINEMA 4D. Then, we move onto working with splines and SweepNURBS in CINEMA 4D to create the look of the text. After we are satisfied with the look of our text, we move into After Effects where we begin to prepare the live action footage for compositing. There are many steps necessary for our clip to be ready to combine with the 3D text. Once we combine the two pieces, we learn lots of tips for further integrating the CINEMA 4D text with the lighting of the live action. We finish off by adding lens effects that are applied to both the 2Dand 3D aspects of the shot, making for a realistically composited final project.
Rapidgator
http://rg.to/file/6304e1c425054708f07ed95e72737896/DTCo3DTLAcCWAEC4D.part1.rar.html
http://rg.to/file/d10ca269b2ed0991803bc623152a4cd0/DTCo3DTLAcCWAEC4D.part2.rar.html
http://rg.to/file/cf9f0c5fcfe0868c28832e9ff1b27de2/DTCo3DTLAcCWAEC4D.part3.rar.html
http://rg.to/file/4505d1af601c866ad943e1e3742a1865/DTCo3DTLAcCWAEC4D.part4.rar.html
?
This tutorial is for you if you are interested in learning the basics for using CINEWARE to unite your live action and CG elements. This CINEWARE workflow presents its own unique challenges as
well as huge speed increases that differ from the traditional compositing approach. By the end of this training, you will have the knowledge you need to begin incorporating 3D elements into live action footage in the fastest way possible.