Archives

All posts for the month May, 2009

null

The Gnomon Workshop: Introduction to Sculpting Fluid Dynamics with RealFlow

Wayne England presents an introduction to the creation of digital fluid dynamics using Real Flow, that includes a systematic breakdown of methods used to generate photo-realistic fluid dynamic effects. The viewer takes a step-by-step look at the fundamental procedures and parameters within Real Flow that together establish an essential, practical, working knowledge of the program. This includes a thorough overview of features important in establishing a production-ready workflow, such as questions of scale, particle meshing, Real Flow Node control via the command line, the data exchange pipeline to other 3D packages and many other practical and creative methodologies. Within the context of the tutorial projects, digital fluids with highly realistic characteristics are developed. The material covered in this DVD is intended for both students and professionals who wish to strengthen their practical understanding of the huge range of aesthetic possibilities in Real Flow.

Continue Reading

null

Summary
Animating physical-based simulations such as particle clouds is somewhat of a Catch-22; exercising too much control makes the simulation look fake, but not enough control prevents you from getting the job done efficiently. Striking the perfect balance between control and randomness in your simulations is essential to creating realistic motion for dust, fire or water. Continue Reading

null

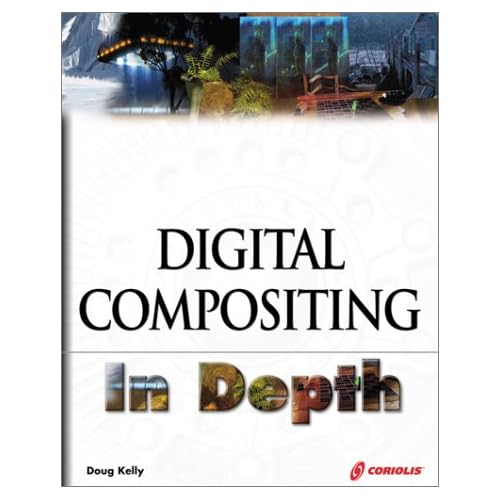
There is often far more going on in any given frame of a contemporary movie or commercial than meets the eye. In Digital Compositing in Depth, the techniques of both visible and invisible effects are explored and explained.

Obvious visual effects are pervasive in today’s broadcast media; less obvious effects like color correction, image stabilization, object removal, and virtual backgrounds are more common than most observers might guess. Continue Reading

Animation Tutorial from ILM & Sony Animator

Humanoid Animation I features the most complex walk cycle ever recorded for an animation tutorial video. In this video veteran animator David Weinstein will show you how he breaks down and begins his walk cycles – moving onto cleanup – and finally the high resolution details. Using a layering technique, David will show the viewer how to understand the mechanics of each section of the body. Building and blending all the body quadrants together to achieve a full character walking performance. Then in the final stages bringing the character to life by adding high frequency animation additions including keyframed skin, muscle, fat and facial performance. This is a tutorial that should not be missed.

Continue Reading

Eat.3D.Autodesk.3DS.Max.101.DVD-iNKiSO

Description: In this demonstration the instructor dives into the wonderful world of computer graphics by walking the viewer through the many fundamental concepts and techniques necessary to create a successful project. He starts off with an around the world tour of the 3D Studio Max interface stopping at key areas to discuss proper viewport navigation, selecting objects, moving objects around your scene and combining basic shapes to flesh out an idea.

Once the foundation is in place, the instructor takes the viewer through a wide range of techniques for modeling, texturing, lighting, and animating their creations to complete a city scene. The pros and cons of each method are discussed in detail and the viewer is given the context necessary to take the core techniques and apply them successfully to whatever their end goal or respective industry may be. Continue Reading

null

In this instructional video Zack Petroc elaborates on his approach to digital sculpting through the creation of a female character. Starting with a low resolution box mesh, the viewer watches as Zack begins by adding gesture and rhythm to the character and then takes the design through to final detailing. The lesson takes place in ZBrush 3.0 showcasing a unique approach to developing surface, reading three dimensional form, and establishing relationships between muscle groups. This lecture is intended for all students and professionals who wish to strengthen their character work through furthering their knowledge of human anatomy.

Continue Reading

null

This tutorial examines using ZBrush?s ZProject Brush to quickly capture our model?s texture from photographic reference. We look at ways to capture texture information from the canvas as well as from SubTool to SubTool. We also look at how to use ZAppLink to mirror a texture.

RAPIDSHARE : (110 MB)

http://rapidshare.com/files/199456726/GnomonologyZBrushZProjectTexture.part1.rar
http://rapidshare.com/files/199456540/GnomonologyZBrushZProjectTexture.part2.rar

null

If you guys are a fan of LOTR then this is just the project for you! Remember the awesome looking Oliphant? Well you to can now follow through this step by step tutorial and model it yourself!

Kurt takes you right from the very start – setting up your image reference planes – to your modeling and final render. We continue the Oilphant Modeling by laying out the UV?s using strips of color which we will use to planar map as well as automatic map to achieve flat Uvs. Once we have our creatures UV?s underway we will use tools such as move and sew UV?s, as well as cut UV?s, to combine and reshape to create a nice flat combined UV map. After our UV map is created its time to learn how to create a UV snapshot to import into a paint program like Photoshop so we can begin to hand paint both the skin color as well as the bump textures of the character. You will learn how to use layers and colors in Photoshop as well as different brush settings to build up skin color. Near the end of the project we will do some prodedural texturing using some of the built-in Maya materials and textures to texture the rigging on our characters back. Continue Reading


ED209 Game Development Masterclass for 3ds Max, Photoshop and UT3 |Rapidshare|Megaupload (4 DVD)

TABLE OF CONTENTS

DVD 1

Scaffold Mesh Building – creating a surrounding approximation mesh that allows us to make sure that everything is going to be built to scale and the right shape and that all the major shapes of the model will lie correctly whilst also allowing us to ascertain what the basic shapes that make the piece are.

Continue Reading

The Gnomon Workshop The Puppet Rig

In this DVD, character rigger Carlo Sansonetti demonstrates the rigging process from research to completion. Carlo covers creating the skeleton and rigging the spine, arms, hands, legs, head and neck. He discusses the core concepts of rigging, including joint orientation and understanding rotation order, as well as some more advanced techniques like stretchy limbs, forearm twist without volume loss, and connecting attributes with Hypershade. This DVD is for students who are new to rigging as well as for professional riggers who are looking for different approaches to rigging their characters

Continue Reading